UPDATE: If doing 2 batches back to back, be sure to wipe IP lid and ring and place lid in refrigerator while cracking eggs into the molds again. Also go to 13 minutes and still do the 2 minutes manual release. This is for large eggs. So if you use 2 molds at a time and do 2 batches back to back you can get 28 perfect hard boiled eggs that you didn’t have to peel! Seriously, it’s life changing!
Don’t let your friends keep peeling eggs, share this post and save the eggs and save their sanity!!
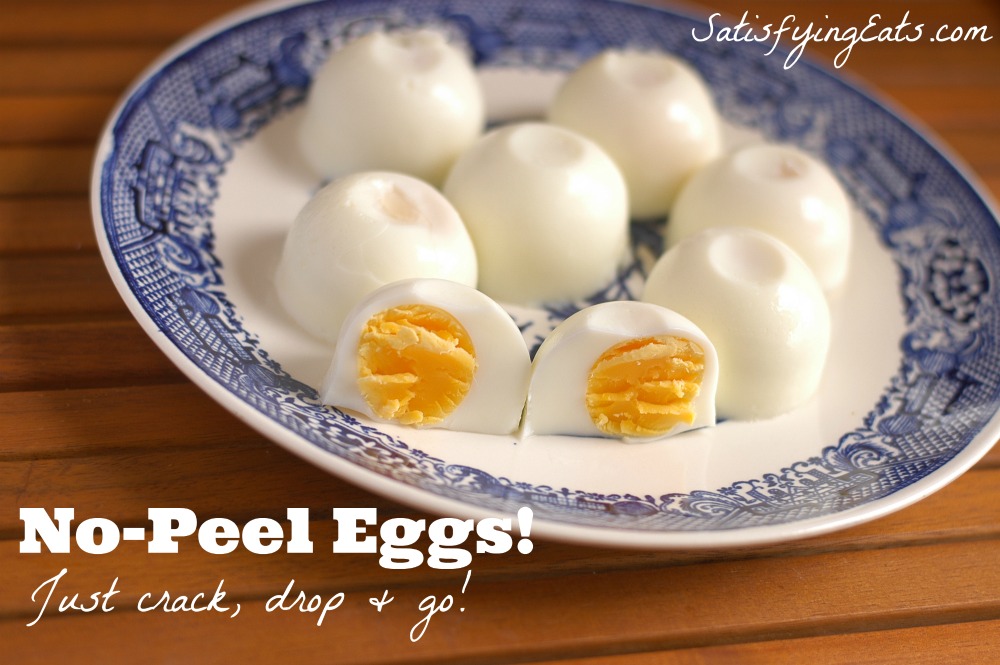
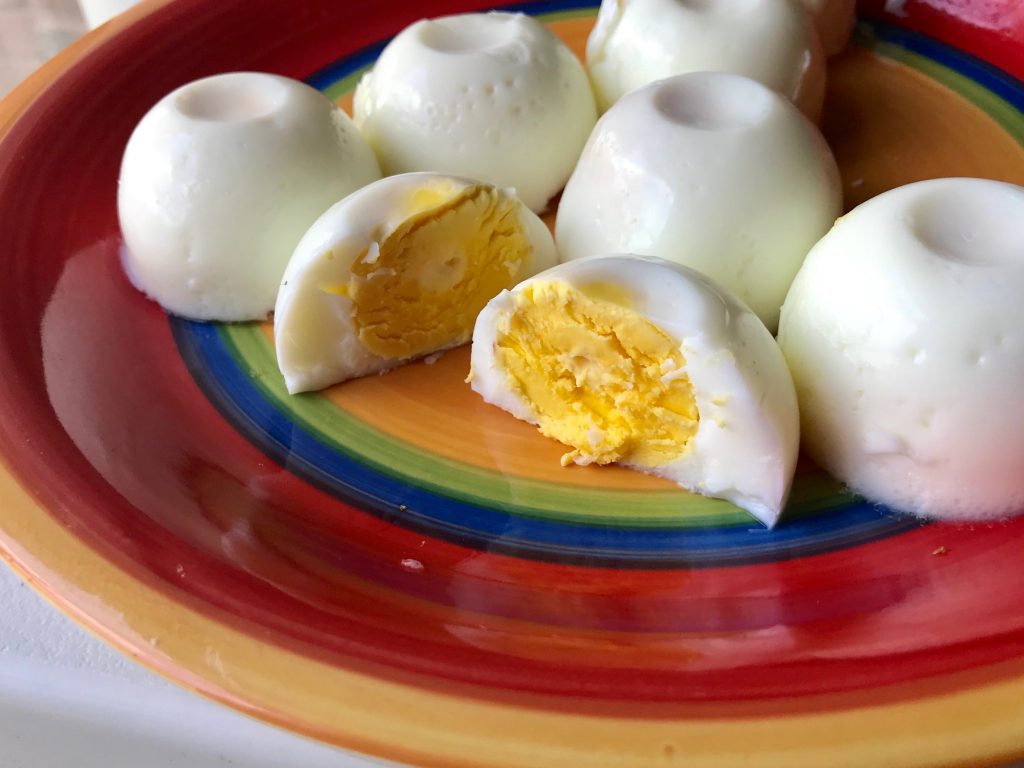
No one likes to boil eggs because NO one likes to peel them! Yeah, yeah, there are “tricks” that SOMETIMES work but there are no guarantees. After months of making my “No-Peel Eggs” I decided it was finally time to share! 🙂
When I first got my Instant Pot almost 2 years ago, I immediately made hard boiled eggs. I was rather disappointed because most of the eggs busted like a can of biscuits AND they didn’t peel easily. 🙁
My method is fool proof, really! AND they still look like eggs! You’re never going to go back to tediously peeling eggs again!
What I REALLY love about my method is that you don’t even need an Instant Pot, you can just as easy and actually cook them QUICKER on top of your stove! WHAT?!? I love it when old school methods still rule! 🙂 But you will need one of these!
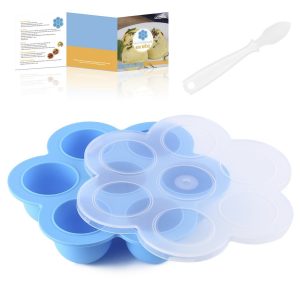
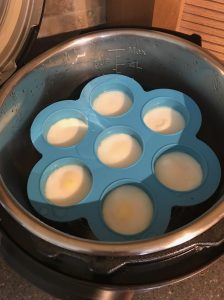
Perfect for No-Peel eggs and Egg Bites!
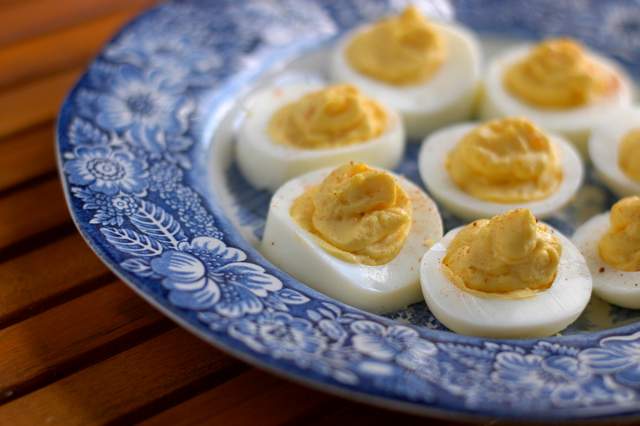
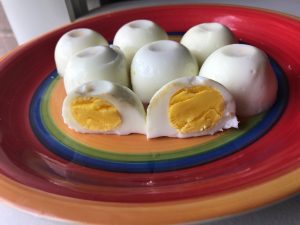
And these eggs are PERFECT for deviled eggs and THEY DON’T SLIDE!!! Just cut the eggs horizontally and prepare as normal. Don’t forget the yummy homemade mayo!
What is your favorite way to eat hard boiled eggs?? Please tell me in the comments! I think a good 7-Layer Salad recipe should be coming up soon!
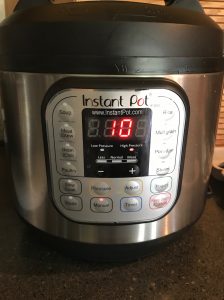
Ok, so here is everything you will need. There are 2 sets of directions below. You do NOT have to use an Instant Pot, you can cook them on top of the stove!
We have surely enjoyed having our own chickens and eggs. The colors are just beautiful and the eggs so tasty!
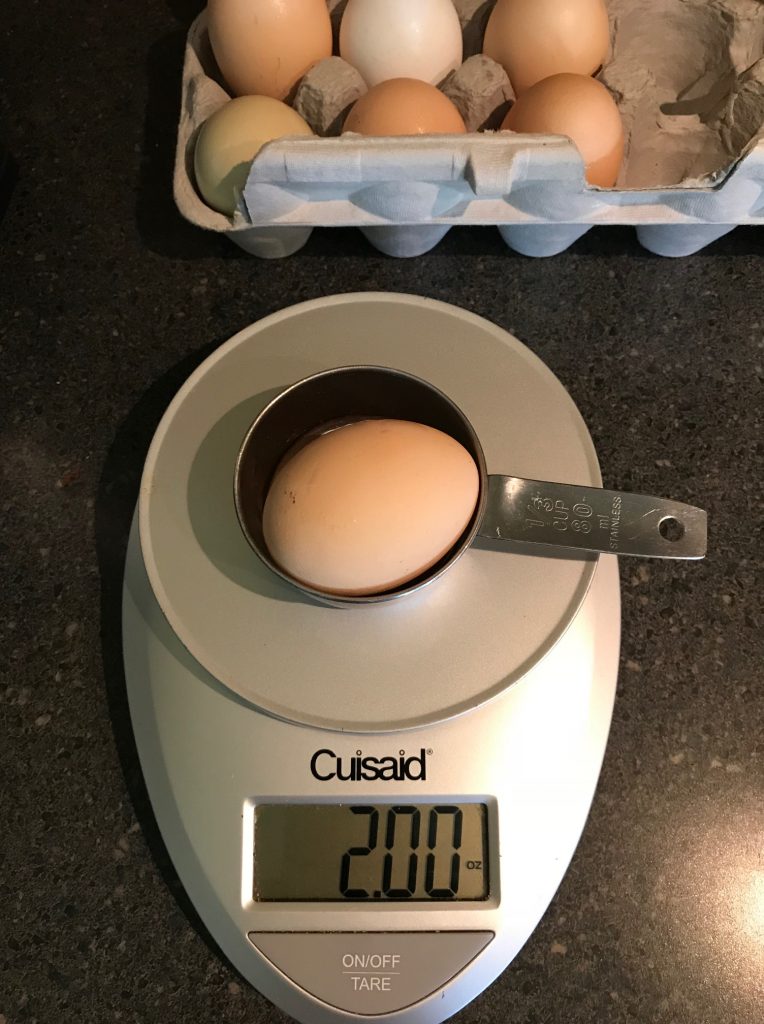
For this recipe, you can use any size eggs. Because we have our own chickens, the egg sizes varied from 1.8 oz-2.10 ounces but they averaged 2.0 ounces. Most store bought eggs average 2.0 ounces so the cooking times will work even if you don’t have your own hens. If you have smaller eggs, lessen the cooking time, if you have jumbo, add 1-2 minutes!
A Few Tips
- UPDATE: Let the eggs cool at room temp for 5-10 minutes or 4 minutes in the freezer before removing from mold, it will make them even easier to come out.
- Eggs will last 4-6 days in the fridge, just depending.
- If you want to do another batch right after the first, you will need to let the Instant Pot cool off if you want to use the same time.
- Make sure the seal of the Instant Pot is dry and clean.
- The Stove Top method is a little quicker but the egg whites will be a little bumpy, not as pretty as if prepared in the instant pot.
Just for a cute kid picture… here is my Anna cooking in her kitchen, she is my chef in training! 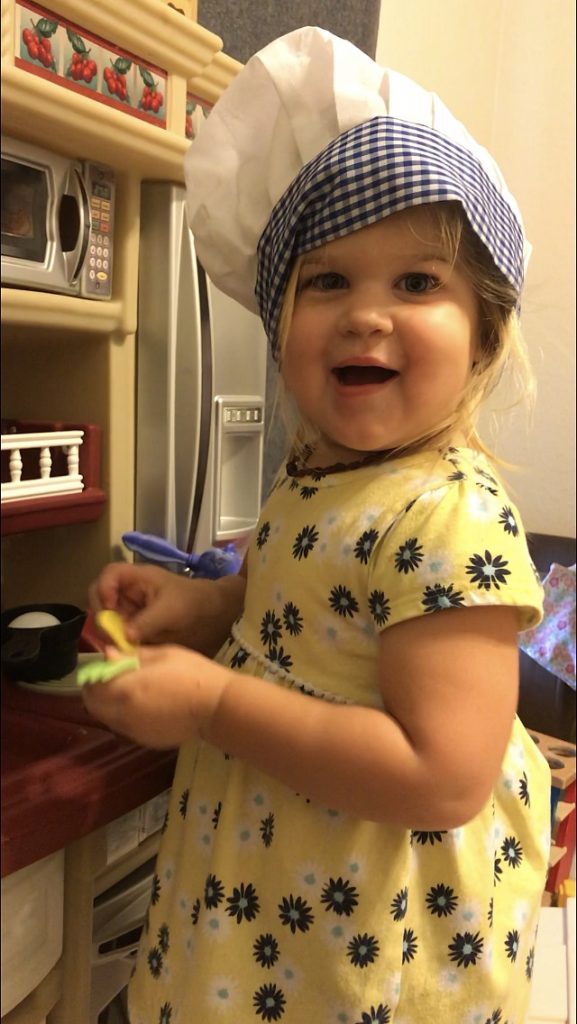
Instant Pot Method:
1 cups of water
7 eggs
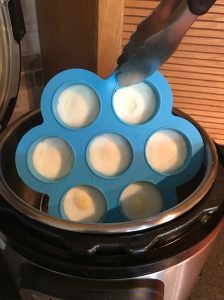
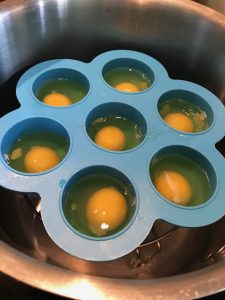
1. Add 1 cups of water to Instant Pot followed by steamer rack and silicone egg mold. Next, lightly oil the inside of the silicone mold with coconut oil or olive oil. Then crack 7 eggs into each hole.
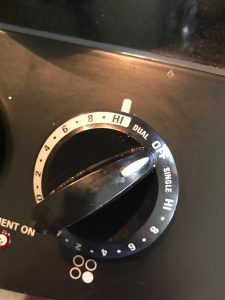
2. Lock lid on and make sure pressure valve is closed. Press "Manual" and adjust time to 10 minutes (11-12 miniutes for larger eggs.)
3. After 10 minutes and timer goes off, wait 1 minute and then release steam and carefully remove lid.
4. Using tongs, carefully remove eggs and place them in freezer for 4 minutes.(If oiling silicone mold, no need to cool eggs in freezer, they will practically just fall out of mold).
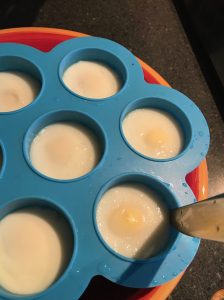
5. Remove eggs from freezer and gently pull mold away from eggs. If needed, run butter knife along edges of eggs.
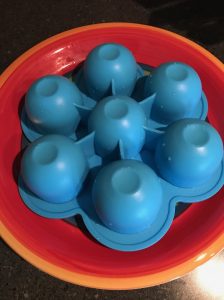
6. Flip over egg mold and gently press on the sides to release eggs onto plate.
7. Perfect no-peel boiled eggs!
Start to finish, around 20 minutes!
FOR 14 EGGS: Crack 14 eggs into 2 silicone egg mold and separate each mold with 3 canning jar lids.
-

- 1. Add 1 cup of water in Instant Pot followed by steamer rack and silicone egg mold. Next, crack 7 eggs into each hole.
-
- 2. Lock lid on and make sure pressure valve is closed. Press “Manual” and adjust time to 10 minutes.
-
- 3. After 10 minutes and timer goes off, wait 1 minute and then release steam and carefully remove lid.
-
- 4. Using tongs, carefully remove eggs and place in freezer for 4 minutes.
-
- 5. Remove eggs from freezer and gently pull mold away from eggs. Use butter knife if needed.
-
- 6. Flip over egg mold and gently press on the sides to release eggs onto plate.
-

- 7. Perfect no-peel boiled eggs!
-
- Start to finish, about 20 minutes!
Stove Top Method
3 cups water
7 eggs
- 1. Place 3 cups of water in bottom of a large pot, followed by a steamer rack and then silicone egg mold. Crack 7 eggs into the holes.
- 2. Turn heat to high.
- 3. Cover with lid and start timer for 14 minutes.
- 4. Let 'em steam. If the lid begins to rattle too much, lower heat to medium.
- 5. After time is up, carefully remove eggs and place in freezer for 4 mintues.
- 6. Remove egg from freezer and gently pull mold away from eggs, run a blunt butter knife around the edges of the eggs for an easy "dismount" from the mold.
- 7. Flip over egg mold and gently press on the sides to release eggs onto plate.
- 8. Perfect no-peel boiled eggs!
- Perfectly cooked "peeled" eggs, start to finish in around 20 minutes!
-
- 1. Place 3 cups of water in bottom of a large pot, followed by a steamer rack and then silicone egg mold. Crack 7 eggs into the holes.
-
- 2. Turn heat to high.
-
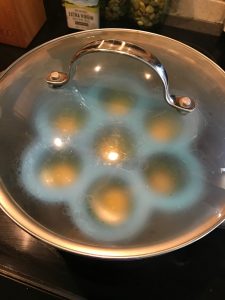
- 3. Cover with lid and start timer for 14 minutes.
-

- 4. Let ’em steam. Once they start to steam, turn down heat to medium.
-
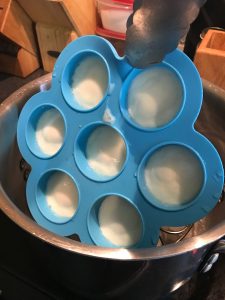
- 5. After time is up, carefully remove eggs and place in freezer for 4 minutes.
-

- 6. Remove egg from freezer and gently pull mold away from eggs, run a blunt butter knife around the edges of the eggs for an easy “dismount” from the mold.
-
- 6. Flip over egg mold and gently press on the sides to release eggs onto plate.
-
- 8. Perfectly cooked and “peeled” eggs!
-
- Perfectly cooked “peeled” eggs, start to finish in less than 16 minutes.