Satisfying Eats

Grain-Free, Sugar-Free & Hunger-Free

  • Home
  • Purchase Cookbooks
  • Classic Biscuit Mix Recipes
  • Parmesan Biscuit Recipes
  • Sweet Baking Mix Recipes
  • Recipes
  • My Story
  • Melissa’s Favorites
    • Melissa’s Favorite Pantry Items
    • Kitchen Essentials
    • Tropical Traditions
    • Honeyville Farms
    • 2 weeks of Meal Planning
    • All about Stevia and MY sweeteners of choice
    • Daily Deals
    • Melissa’s Tips for Success
  • Support
    • Contact
  • Satisfying Eats’ Amazon Store
  • Birthday Cake Recipes

Homemade Coconut Milk

May 21, 2013 By satisfyingeats 23 Comments

028

“Why did I not try this a long time ago???”  This is what I have been telling myself since making my first batch of homemade coconut milk over a week ago.  It can’t get any easier: hot water and coconut flakes (or chips from Tropical Tradition), blend, strain and Vualá!!! The stuff I had been purchasing in the can has never tasted great but I considered it to be my only option.  It is also getting harder and harder to find canned coconut milk with only water and coconut as the ingredients and the price of $3-4 a can was breaking the bank!

Cost breakdown when making homemade coconut milk:

From 1 lb of Coconut Flakes (or chips) I can make approximately 12 cups (3 quarts) of coconut milk!!  So that’s about $1.25 for 1 quart of homemade Coconut Milk (based on buying Tropical Traditions Chips with Free Shipping) and then you get the “shredded coconut” for free as a by-product!  Even without free shipping, it will still cost you about $2 per quart!

Since giving up dairy and nut products a few weeks ago (I have introduced some nuts back but not almond milk), coconut milk has been my go-to for my protein shakes. My homemade coconut milk makes my shakes taste even better than before!!

I made quiet a few batches, experimenting with blend time and which type of blender to use.

Here is what I concluded:

  • Using a Vitamix or small Magic Bullet worked best and produced more coconut cream.
  • I used hot water out of the tap. If you have city water, I would use filtered water that has been boiled.
  • Small batches yielded more coconut milk and cream and a finer coconut pulp.
  • I haven’t figured out a way to keep the coconut milk from separating from the cream. I tried gelatin but that didn’t seem to work.
  • Pour coconut milk into smaller containers to use so that you don’t have a large container of milk with all the cream hardened on top which you can’t really separate when ready to use unless you blend the entire batch. I just poured mine into pint jars and stored in the fridge.
  • Freeze coconut milk in ice-cube trays while still warm and before cream hardens on top to use to make milk shakes.
  • Homemade coconut milk is not like the thick stuff in the can.  The cream will rise to the top and the watery “milk” will remain on bottom.  Don’t expect a viscous milk.  I am still trying to figure out how the manufactures do it besides adding thickeners.

Note: Tropical Traditions calls their large pieces of coconut “Chips” while Bob’s Red Mill and other brands call them “Flakes.” I have used both but mainly Tropical Traditions because they are on sale for $8.50 for 2.2lbs! 

If you can get your hands on fresh coconuts, you can use the fresh meat of the coconut as well!

015

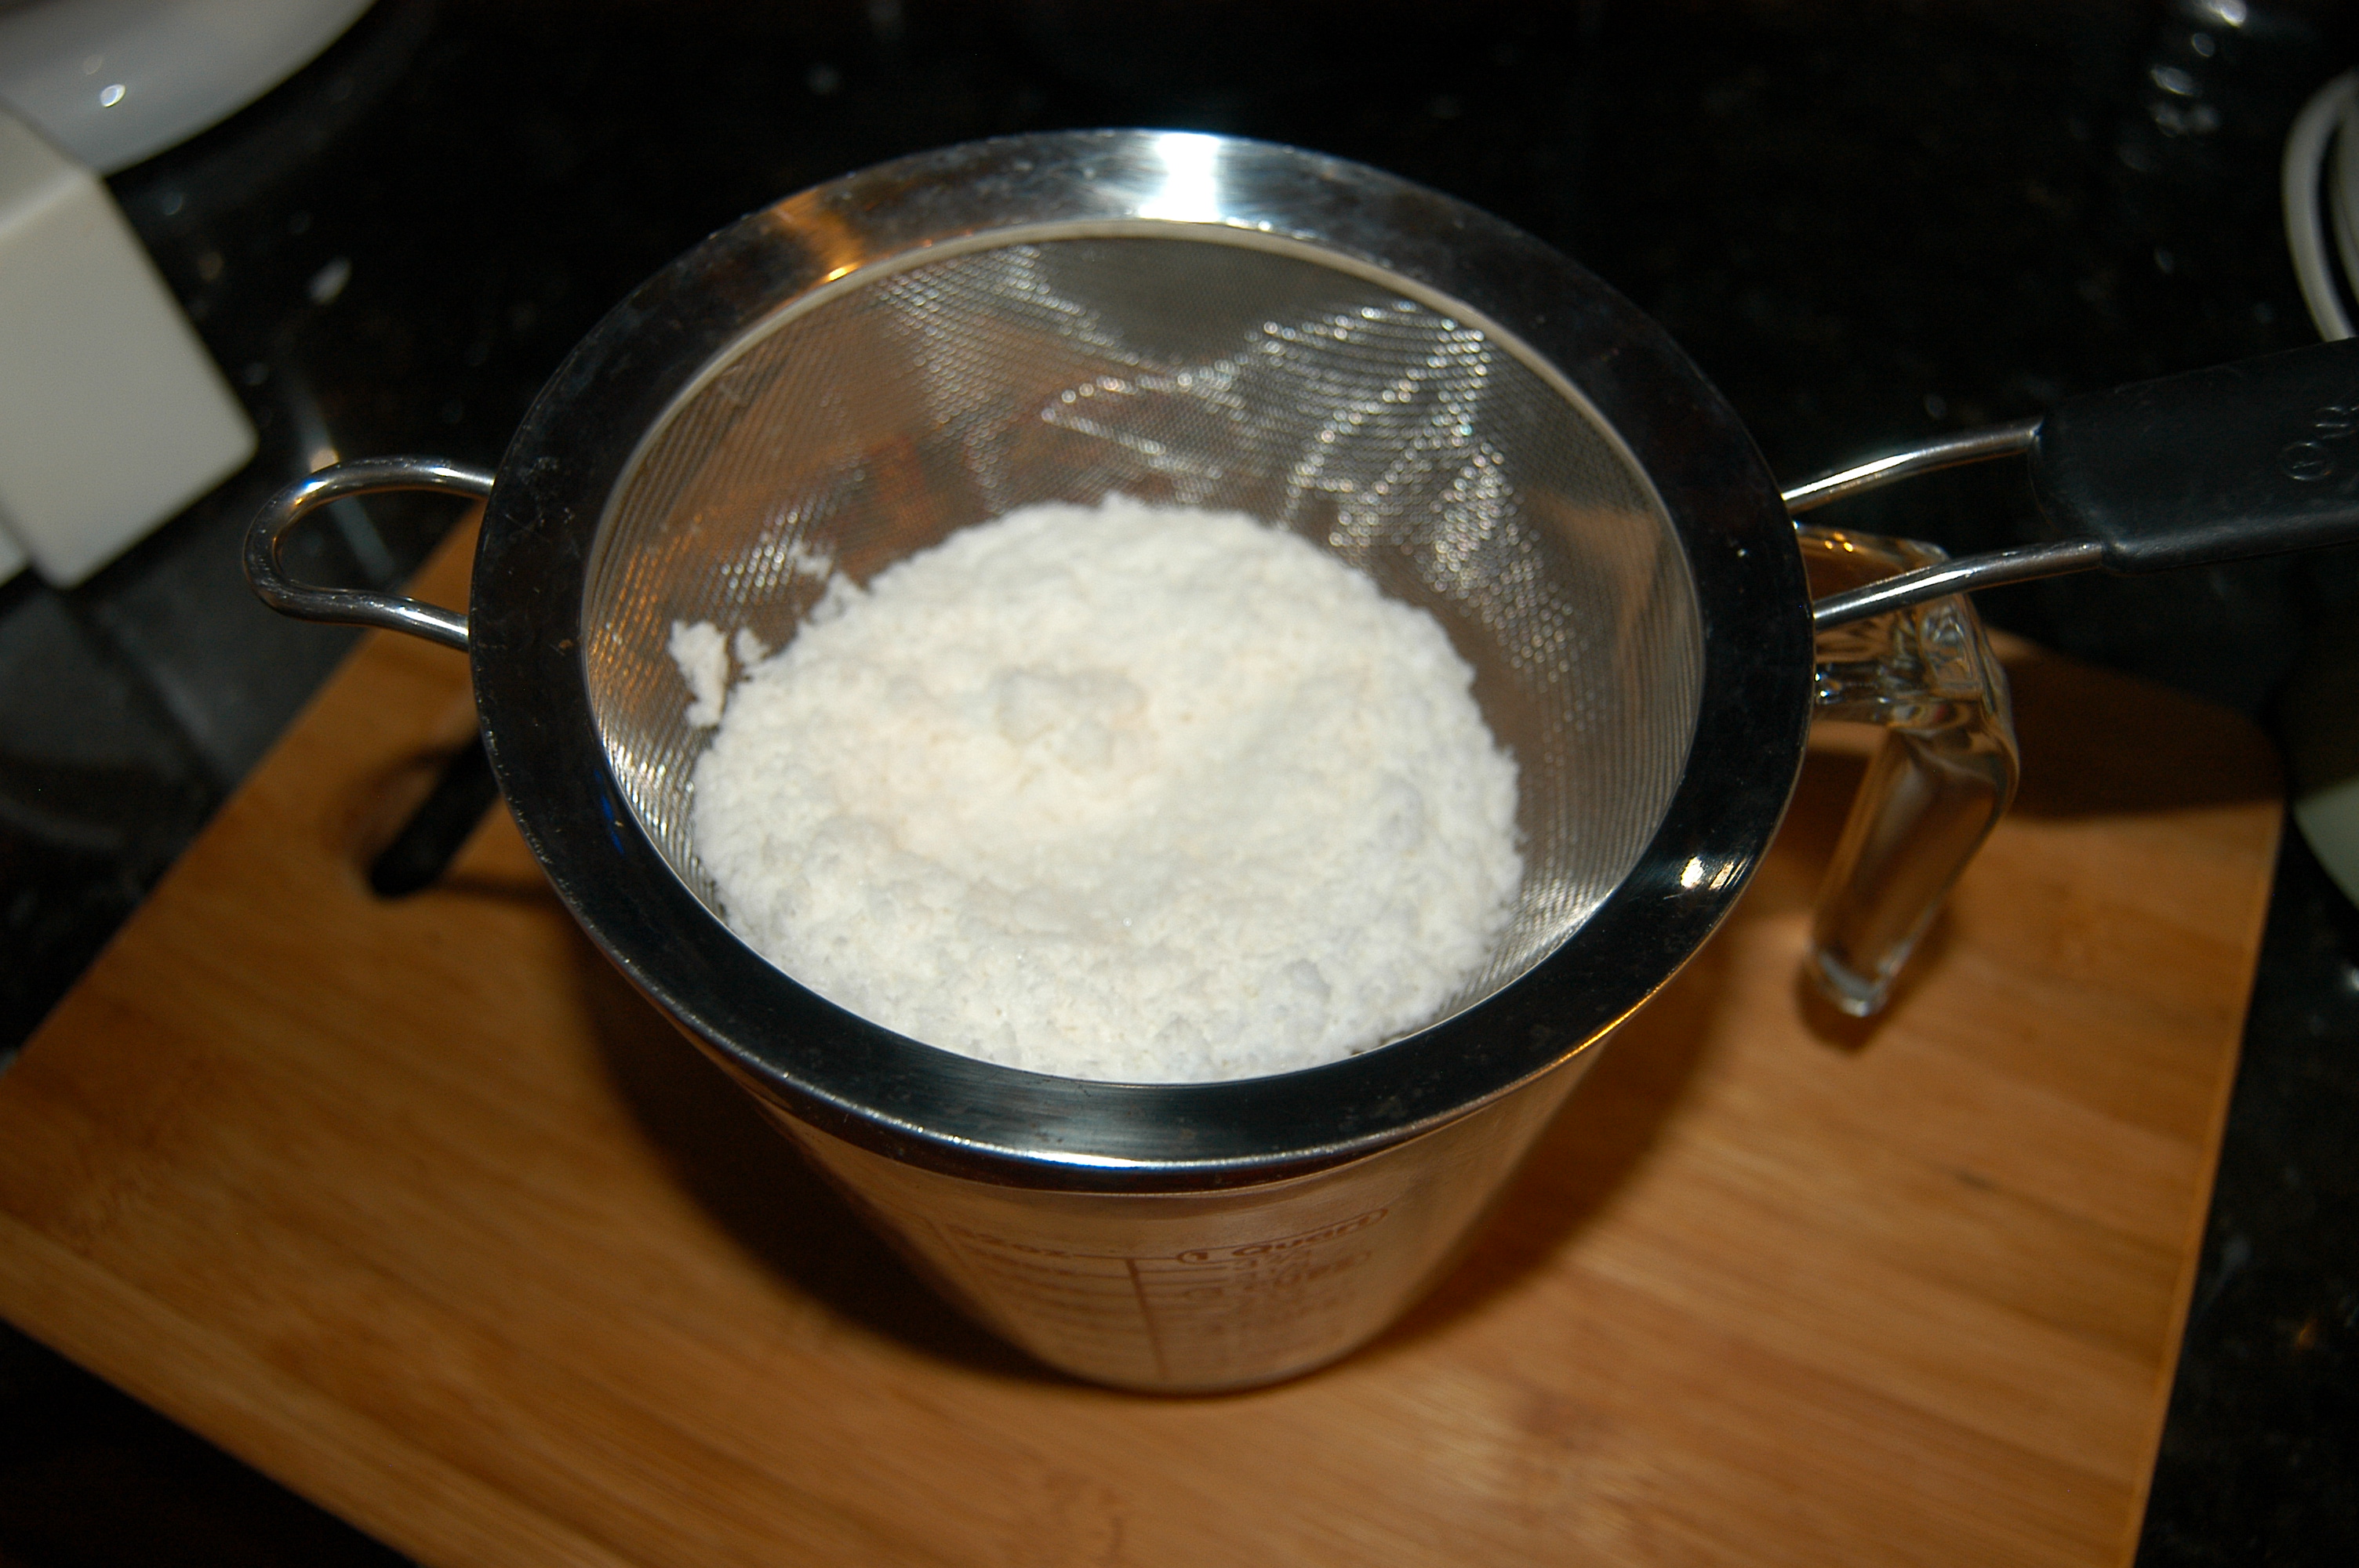
Straining coconut milk through mesh strainer

043

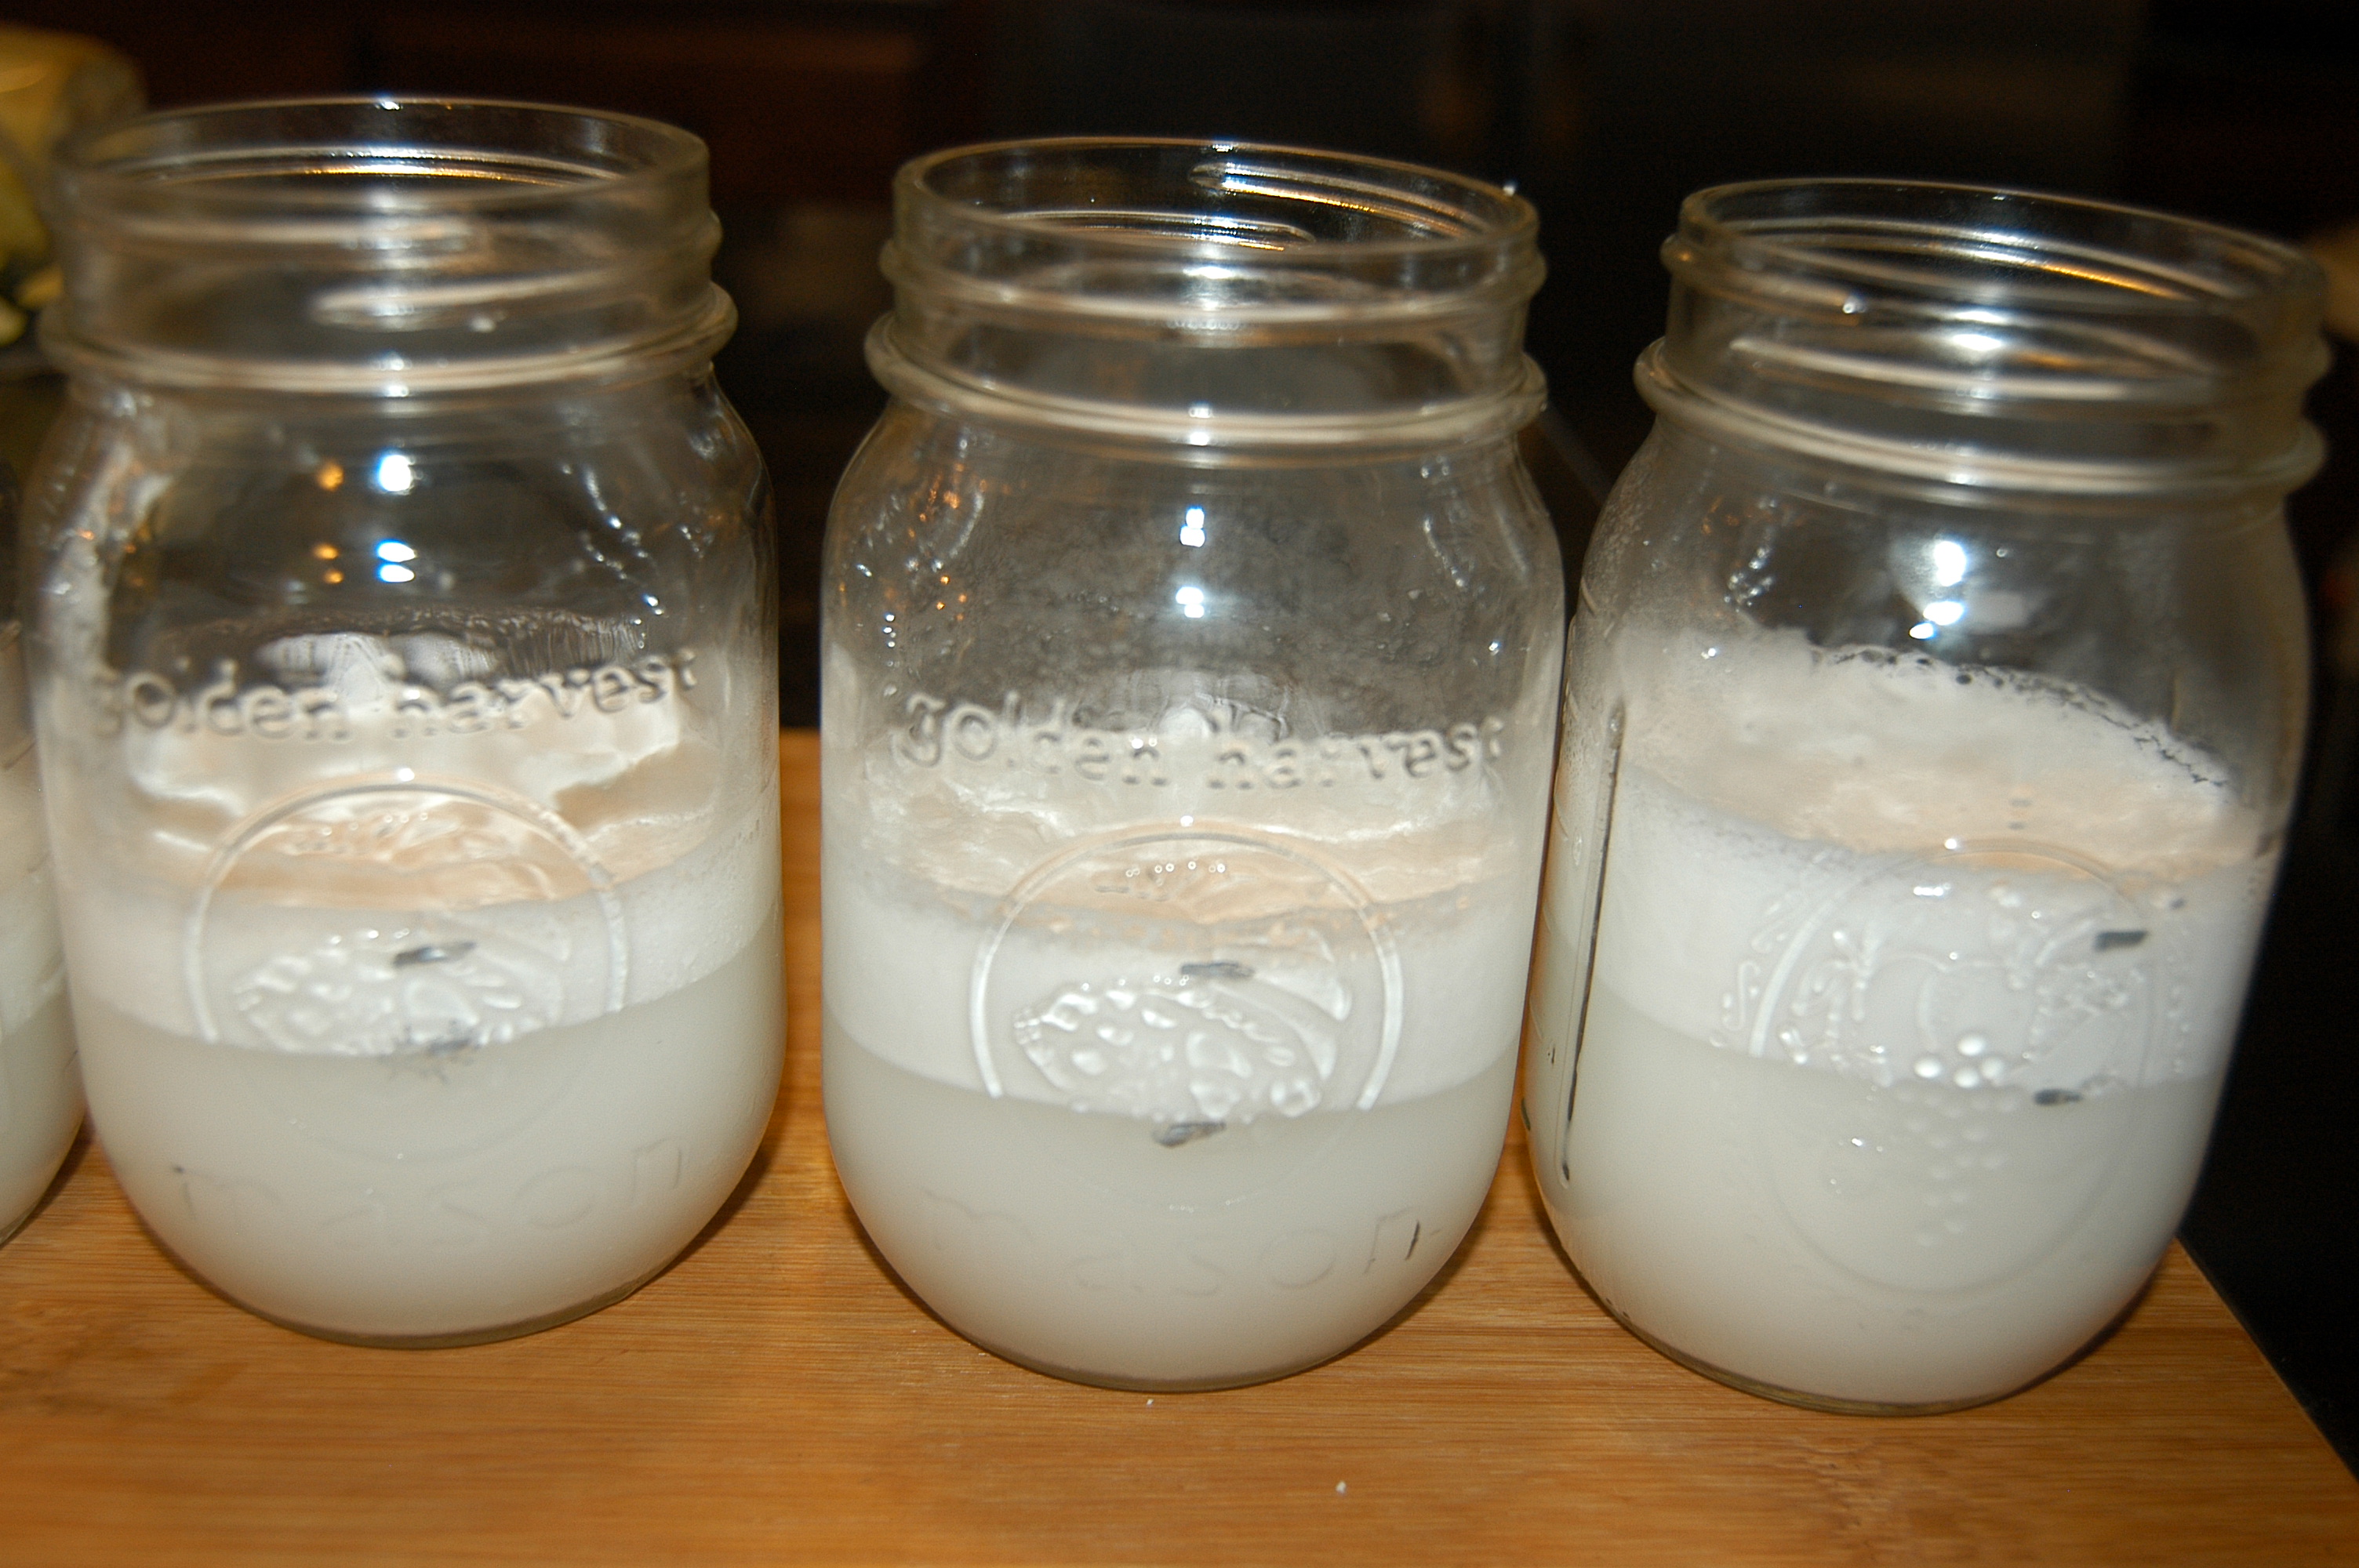
Comparing the amount of coconut milk and cream yield. The only difference was blend time.

028

Leftover coconut pulp or shredded coconut.

034

Leftover pulp going in oven to dry out.

Homemade Coconut Milk

Makes 1.5 cups

1 cup (around 2 oz by weight) unsweetened coconut flakes (or Tropical Traditions coconut chips)

1 cup hot (or boiling) water

1/2 cup hot (or boiling) water

Directions

Using Blender, Vitamix or Magic Bullet, add coconut and first 1 cup of hot water.  Blend for a minimum of 2 minutes and as much as 3.  Place mesh strainer over bowl to collect milk.  Pour coconut and water slurry into strainer and allow milk to drip into bowl. Use spoon to press coconut pulp to extract all of milk.

Return pulp to blender and add 1/2 of hot water. Blend for another 1-2 minutes and strain.  Pour into pint jar or ice-cube trays.  Last 3-4 days in the fridge.

Before drinking, blend cooled coconut milk to mix the cream back in with the milk.

What to do with the leftover coconut pulp?

Pre-heat oven to 250 degrees F.  Line cookie sheet with parchment paper.  Spread coconut pulp over parchment in a thin layer.  Bake for 1 hour then stir and spread coconut back into a thin layer.  Place back into oven then turn off oven.  Let set in oven night.  Check to see if coconut is completely dried out, if not, bake for another hour at 250 degrees F.

Uses For Pulp

Use in the place of panko bread crumbs when frying something (I have used it to make coconut shrimp).

Use in the place of shredded coconut in recipes.  I have a Coconut Macaroon recipe coming up soon.

Uses for Coconut Milk

Use this milk in the place of almond or regular milk in any of my shake recipes.  I will be experimenting this week using it in my Birthday Cake recipe (the dairy-free version which is also my favorite).

Check out my Chocolate, Vanilla and Strawberry Milk Recipes!

009

Note: Many of the links contained in this post are Affiliate Links. If you purchase through the links provided, I will receive a small (very small) commission which I used to buy more ingredients to create more recipes.  I have chosen these products not to receive a commission but because I think they are the best on the market.  Thank you for your support! 

Related

Filed Under: Beverages, Dairy Free

About satisfyingeats

“...no one is born a great cook, one learns by doing.” ~ Julia Child
Melissa is the mother of 2 beautiful boys and the creator of the Satisfying Eats Blog. She has also authored two cookbooks, Satisfying Eats and Comforting Eats, out of her love for Southern food but with a grain-free twist.

From an early age, Melissa has always loved to cook, and after going grain-free almost three years ago, she has had to relearn everything she thought she knew about great cooking so that she could continue to create delicious recipes. Creating tasty Grain-Free Southern food and helping everyone she can along the way is her passion.

Melissa graduated from Georgia Southern University with a Bachelors in Exercise Science. She also has been personal training and teaching STOTT Pilates for over 10 years.

« The Grain-Free “Corn” Dog
60-Second Chocolate Shot (Chocolate Frosting) »

Comments

  1. Brenda says

    May 22, 2013 at 11:11 pm

    I make coconut milk all the time with Fresh Coconut as you mentioned.. Why wouldn’t you want to just use a fresh coconut to make yours instead of buying “flakes & or chips”? I thought Fresh Coconut was available in most supermarkets & ethnic stores…. Being from Jamaica we use coconut milk in quite a few recipes so I am accustomed to making it…you just cut up the coconut into small pieces, in a blender then add your water to it & blend & strain….coconut cost a buck fifty at the most ($1.50)

    Reply
    • satisfyingeats says

      May 22, 2013 at 11:13 pm

      Brenda, where I live, we don’t have coconuts readily available. I did mention I would like to use fresh. Of course, fresh is always better! 😉

      Reply
    • mysti says

      September 8, 2013 at 10:53 am

      we have fresh coconut available here but it is cost prohibitive … wished we could do fresh !!

      Reply
  2. Joann says

    May 28, 2013 at 7:27 pm

    In the picture with the 3 jars, is the one on the right blended less and the jar on the left blended more?

    Reply
    • satisfyingeats says

      May 28, 2013 at 7:28 pm

      The pic on the right is blended more.

      Reply
      • Joann says

        June 7, 2013 at 3:10 am

        Okay, thanks!

        Reply
  3. Bevbstylin says

    May 30, 2013 at 10:11 pm

    how long will this last in the fridge?

    Reply
    • satisfyingeats says

      May 30, 2013 at 10:13 pm

      I had some in fridge almost 2 weeks. I didn’t expect it to last that long but it did.

      Reply
  4. Patti Ingram says

    June 4, 2013 at 4:54 pm

    Wonder if you could use a little xanthan or guar gum as an emulsifier to keep from separating?

    Reply
    • satisfyingeats says

      June 4, 2013 at 4:58 pm

      Patti, it shouldn’t separate. It should be a like ganach before placing in the fridge. Perhaps make a half a batch next time and see how they turn out. Try adding the water, a little at the time if you are having trouble with it separating. Hope this helps and keep me posted!

      Reply
  5. sherry lloyd says

    June 30, 2013 at 3:10 am

    Mine separates but I just give it a shake and it mixes up. No need to reblend it.

    Reply
  6. Lisa says

    July 5, 2013 at 3:33 pm

    Thank you for all of your hard work. I haven’t tried making any coconut milk yet, but I am about to. When I make almond milk I use 2 tbsps of coconut oil then blend on high with vitamix, to emulsify the milk. I wonder if that would work the same with coconut milk?

    Reply
  7. April says

    July 11, 2013 at 1:24 am

    Just started making my own coconut milk due to the one store in my area not keeping it in stock. As it turns out…thank you to them because making it tastes much better, cheaper and I know exactly what’s in it. It is delicious. I’ve been using sunflower lecithin, about a tsp per quart blended together with it after I’ve gotten all the milk out. I had to order the sunflower lecithin (handy way to avoid soy for thickening/emulsifying)online but looks like this jar will go a long way.. I’ve not had the fat separating to the top doing that. Coconut oil may work too, will have to try it. Coconut is my new best friend 🙂

    Reply
    • satisfyingeats says

      July 11, 2013 at 1:27 am

      Great idea April! I need to make some tomorrow and I will try the coconut oil! Yeah, it’s pretty hard (or impossible) to find the good stuff anymore and if you do, it’s pretty expensive!

      Reply
  8. Demi says

    July 14, 2013 at 2:20 am

    I see both of these ingredients in the comment section, but I use 1/4 tsp Bob’s Red Mill Xanthan Gum & 1 Tbsp of Nutiva Virgin Coconut Oil (per litre of milk made), to keep it from seperating. I also LOVE to use a blend of fresh & shredded coconut. I find that the oil enhances the flavour & the xanthan gum gives it such a thick and creamy texture. The mouth feel is full-bodied & downright luxurious.

    Reply
    • Demi says

      July 14, 2013 at 2:22 am

      Ack! Typo! Separating** 🙂

      Reply
  9. Peg says

    July 26, 2013 at 2:53 am

    Thank you for the detailed info to making coconut milk. I’ve used your post several times to make homemade coconut milk and pour the milk into silicon ice cube trays to put into the freezer. I use 2 cubes in a coffee, protein powder & frozen fruit (blueberries, strawberries, etc.) to make a morning iced coffee drink that I take out back to enjoy a morning respite in our garden and take in the view of the vegies growing, the hummingbird antics and the cool morning air. Our two girls (Clare, Shih-tzu/poodle mix, and Lizzie, our rescue terrier mix) know that when Mommy is making her iced coffee it is time to go out back so they can check out every square inch of the yard. It is our special time.

    Making coconut milk is so easy and no nasty gums or worrying about BPA in the cans. Thanks again, Melissa!

    Reply
  10. Erin Hill says

    December 6, 2013 at 7:37 am

    Would this be considered full fat or light coconut milk? I can get organic coconut chips at our grocery store for $2.25/lb. Picking some up today – my kids love curry, so we use it quite a bit. BTW – just came upon your blog a few days ago, so thankful I did!

    Reply
  11. Sarah says

    March 21, 2014 at 2:06 am

    Have you tried making the coconut milk with the coconut oil yet (to keep it from separating)? If so, how did it turn out? Also, on a personal note, have you ever had an issue with coconut oil making you nauseous? Our family went no sugars, no grains almost a year ago. About 3 months into the new lifestyle, certain foods that are high in saturated fat started making me nauseous if I ate them on an empty stomach – and I mean to the point I have to lay down for 30-60 minutes to let it pass. Included so far are eggs, avocados, macadamia nuts, almonds, and now coconut oil I just started using the coconut oil recently. I was so excited about everything I read that I put some in a smoothie as soon as it arrived. Like clockwork, about an hour or so after the smoothie, I got nauseous. Just wondering if anyone else has had any similar issues.

    Reply
  12. Marianne says

    January 4, 2017 at 8:04 am

    I have recently purchased Maggi brand coconut powder. 2 Tbl.sp. per 1c warm water. it stays nicely blended. no sugar added so if your looking for a bit of sweet you can add some. I used 4 Tbl. powder as I like it a bit more creamy. it was about $4.00 CAD and will make about 12 litres. or Quarts. great bargain, never spoils in the pantry and has a year expiry date on the box… You can’t go wrong with that. Also, has no extra additives.

    Reply
    • satisfyingeats says

      January 5, 2017 at 10:15 am

      Never heard of coconut powder Marianne but I love the idea! Thanks for sharing!

      Reply

Trackbacks

  1. Old Fashioned ‘Nana Puddin’ with Vanilla “Wafers” | Satisfying Eats says:
    July 10, 2013 at 7:20 pm

    […] Market every week, I haven’t been using nearly as much heavy cream and I have been using coconut milk as much as I […]

    Reply
  2. Pecan Pie Ice Cream and Ice Cream Maker Giveaway | Satisfying Eats says:
    July 18, 2013 at 1:58 am

    […] free to use full fat coconut milk in place of the dairy and half and half. I have also used my Homemade Coconut Milk and it turned out […]

    Reply

Leave a Reply Cancel reply

Your email address will not be published. Required fields are marked *

Recipe Rating


Recipe Search

Your Shopping Cart

Your cart is empty
Comforting Eats Cookbook
Comforting Eats (Spiral Bound)
$20.00
Learn More
Satisfying Eats Cookbook
SatisfyingEats (Spiral Bound)
$19.00
Learn More

Top Recipes

  • No-Peel Eggs: Just crack, drop & go!
  • Home page
  • BEST Homemade Mayo (Updated: Magical 1-Minute Mason Jar Mayonnaise)
  • Cheesy-Cheese Garlic Biscuits (Grain-Free Red Lobster Biscuits)
  • Amazing Strawberry "Pretzel" Salad (Low-Carb)
  • Grain-Free Irish Soda Bread
  • Low-Carb Creamy Taco Soup
  • Recipes
  • 10 Grain-Free Cereal Recipes & More Breakfast Ideas
  • Melissa's Famous Cheesecake
  • The Grain-Free "Corn" Dog
  • Easy Deep-Dish Pizza Pie

Newsletter

Tags

"rice" bacon blueberries bread Breakfast brownies Cake Cakes casserole cheese Cheesecake Chicken Chocolate cinnamon Coconut oil comforting eats cookie Cookies crock pot cupcakes Dairy Free frozen treats gelatin ground meat ice cream instant pot low-carb mexican nut free pancakes party party foods Pizza Pumpkin quick sausage Shakes Shrimp slow cooker Soup spaghetti squash Strawberries taco thanksgiving waffles

My Story

Nick’s Sticks

100% Grass-fed Beef and Free Range Turkey Sticks. Order Now.

Blue Apron

Copyright © 2021 · Foodie Theme by Shay Bocks · Built on the Genesis Framework · Powered by WordPress